Last updated:
March 2026 Product Updates
.png)
March was about giving you more control over how you organize, present, and work with your model. Five updates this month, each addressing a different part of the design workflow.
Here is what shipped and how it fits into everyday architectural work.
New AI Pipeline and Improved Site Analysis

The AI stack now works entirely at the department level during early design. Space-level generation has been moved out of the core pipeline, which makes processing faster and the outputs clearer, especially on larger projects.
Three new stages are now part of the pipeline: Massing Generation, Core Generation, and Pack. Together they define the building's form, circulation, and department layout before you start refining. The full sequence is now: Site, Envelope, Core, Department Generation, Department Storey Assignment, Adjacency, AI Inspiration, and Pack (optional). Space-level workflows remain available through Program Mode dropdown agents when you need detailed program development.
Site Analysis is also significantly more accurate for US projects. Building codes are now pulled from official municipal sources through live web search alongside the existing Zoneomics integration. The Chain of Thought includes direct links to the specific government pages and sections used, so you can verify every figure. Follow-up corrections now work as expected when you reprompt with updated inputs.
How architects can use this
The pipeline change matters most on complex or large projects where early AI runs used to slow down under the weight of space-level geometry. Working at the department level during massing and layout keeps things fast and keeps the focus on decisions that matter at that stage. For site analysis, the accuracy improvement means you can use the outputs in feasibility studies with more confidence, and the source links mean you are not just trusting a number, you can check where it came from.
Custom Space Tags
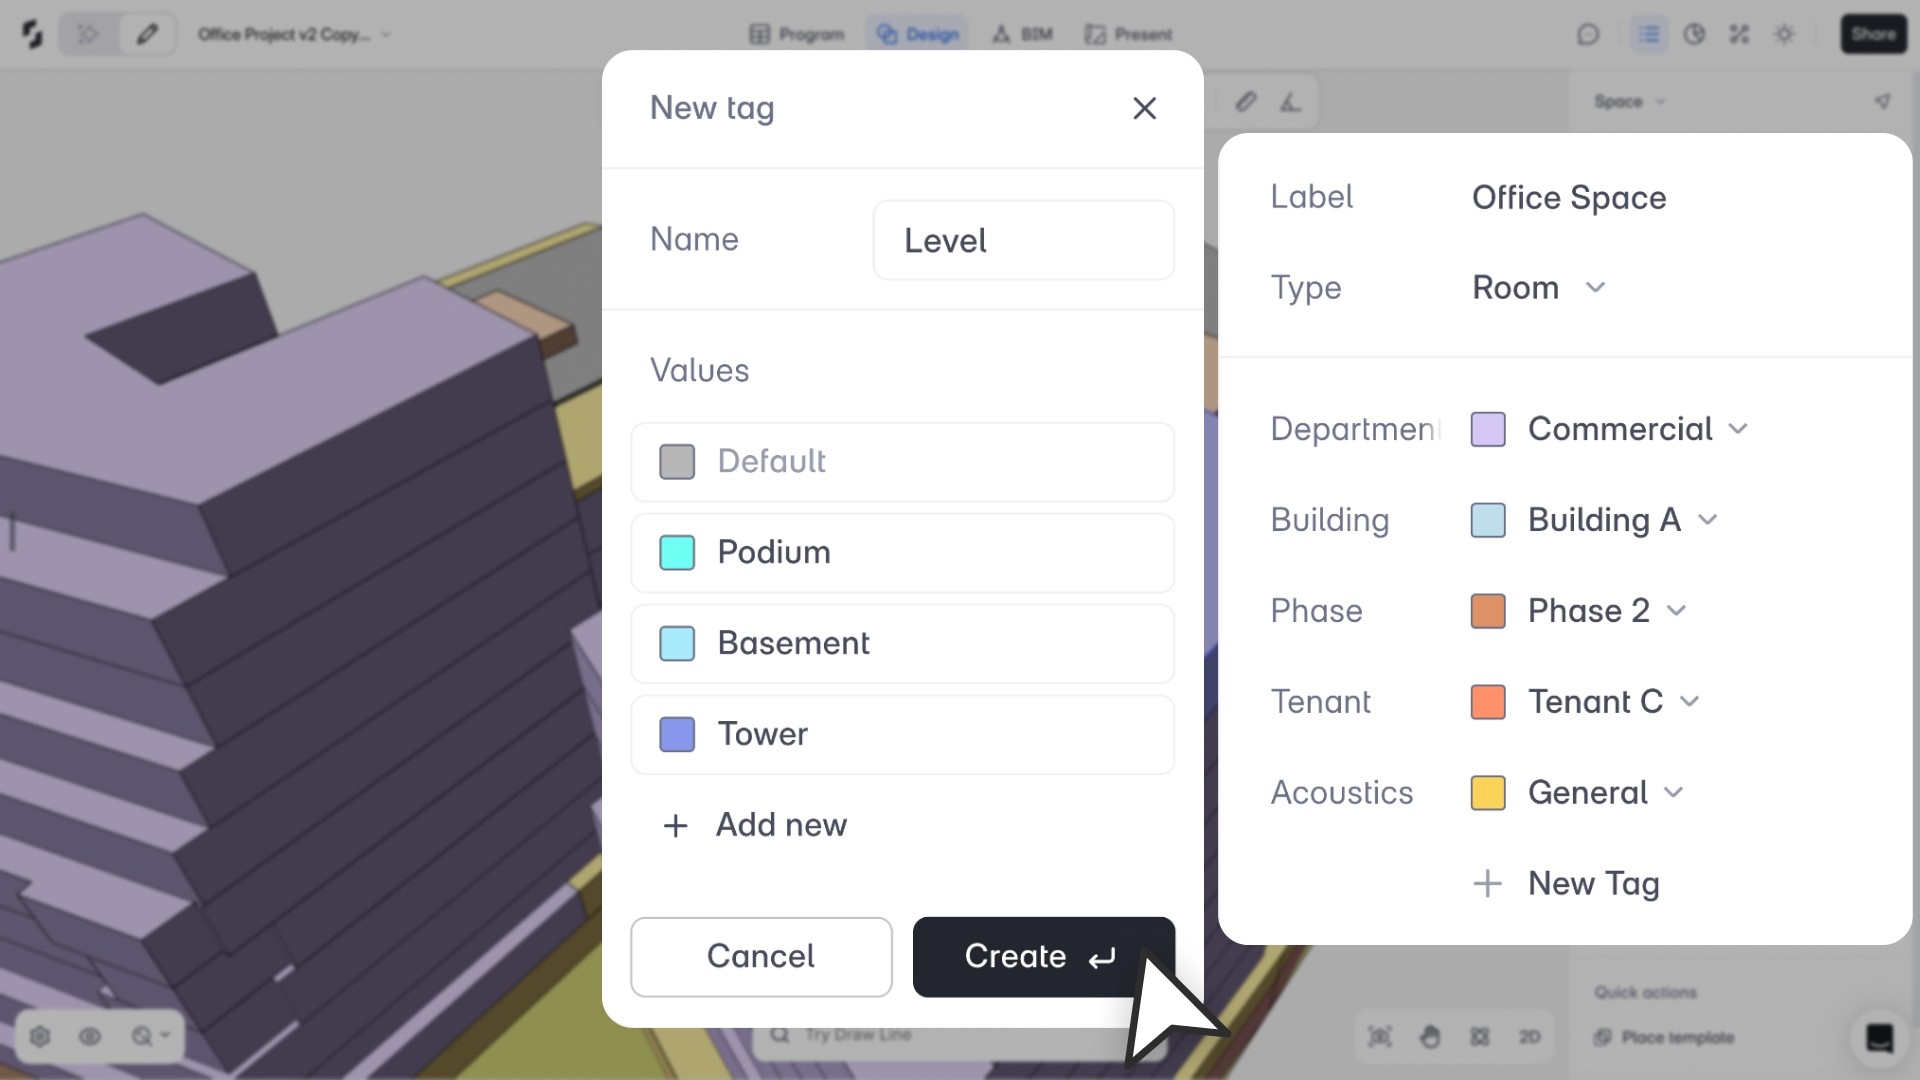
Spaces in a project rarely fall into a single neat hierarchy. A room might belong to a department, a building phase, and a cost zone all at once. Until now, the tools for organizing that weren't flexible enough to reflect how teams actually think about a project.
You can now create custom Tag Categories and assign them to spaces across as many dimensions as your project needs: Department, Phase, Building, Specialty, or anything else. Each space gets one tag per category. Tags stay consistent across Design Mode, Program Mode, and the Area Panel.
Every space also has an explicit Area Type you can see and edit directly: Net, Gross, or Excluded. Space Types give sensible defaults, and your overrides always take priority. Planning blocks, rooms, and non-program areas can now sit in the same model without the area numbers getting confused.
In Program Mode, tag categories appear as custom columns. In the Area Panel, you can sort and filter by any tag or type, and view Excluded Area separately.
How architects can use this
On mixed-use or phased projects, you are constantly tracking multiple dimensions at once. A space might be part of Phase 1, belong to the retail department, and sit in Building B. Custom tags let you slice the program by any of those dimensions without restructuring the model. Area calculations reflect your explicit settings, so the numbers you present are the numbers you actually mean.
Layers

You can now separate your model into layers, with full control over what is visible, what is editable, and what different team members are working on at any given time.
Every object belongs to one layer. You can create, rename, delete, show, hide, and lock layers from a new Layers panel. Each user has their own active layer, so multiple people can work in parallel without stepping on each other. Lock state is shared across the project, so when someone locks a layer, it is locked for everyone.
Each presentation view remembers its own layer visibility settings. Save a clean presentation view with only the layers you want shown, and a separate working view with everything on. Layer visibility is restored automatically when you switch between views.
Layers are available as filters in the Area Panel. A Layer column in Program Mode lets you reassign objects from the spreadsheet view. Hidden layers are excluded from all exports.
How architects can use this
The most immediate use is design options. Instead of duplicating a project to test a variation, you create a layer for each scheme, hide and show them to compare, and lock the ones you are not actively editing. Context geometry, topography, BIM model, and spaces can all sit on separate layers so you reduce visual noise without deleting anything. For teams working across time zones or in parallel on the same project, layers give each person a clear working area without the risk of accidentally editing someone else's work.
Dimensions in Present Mode
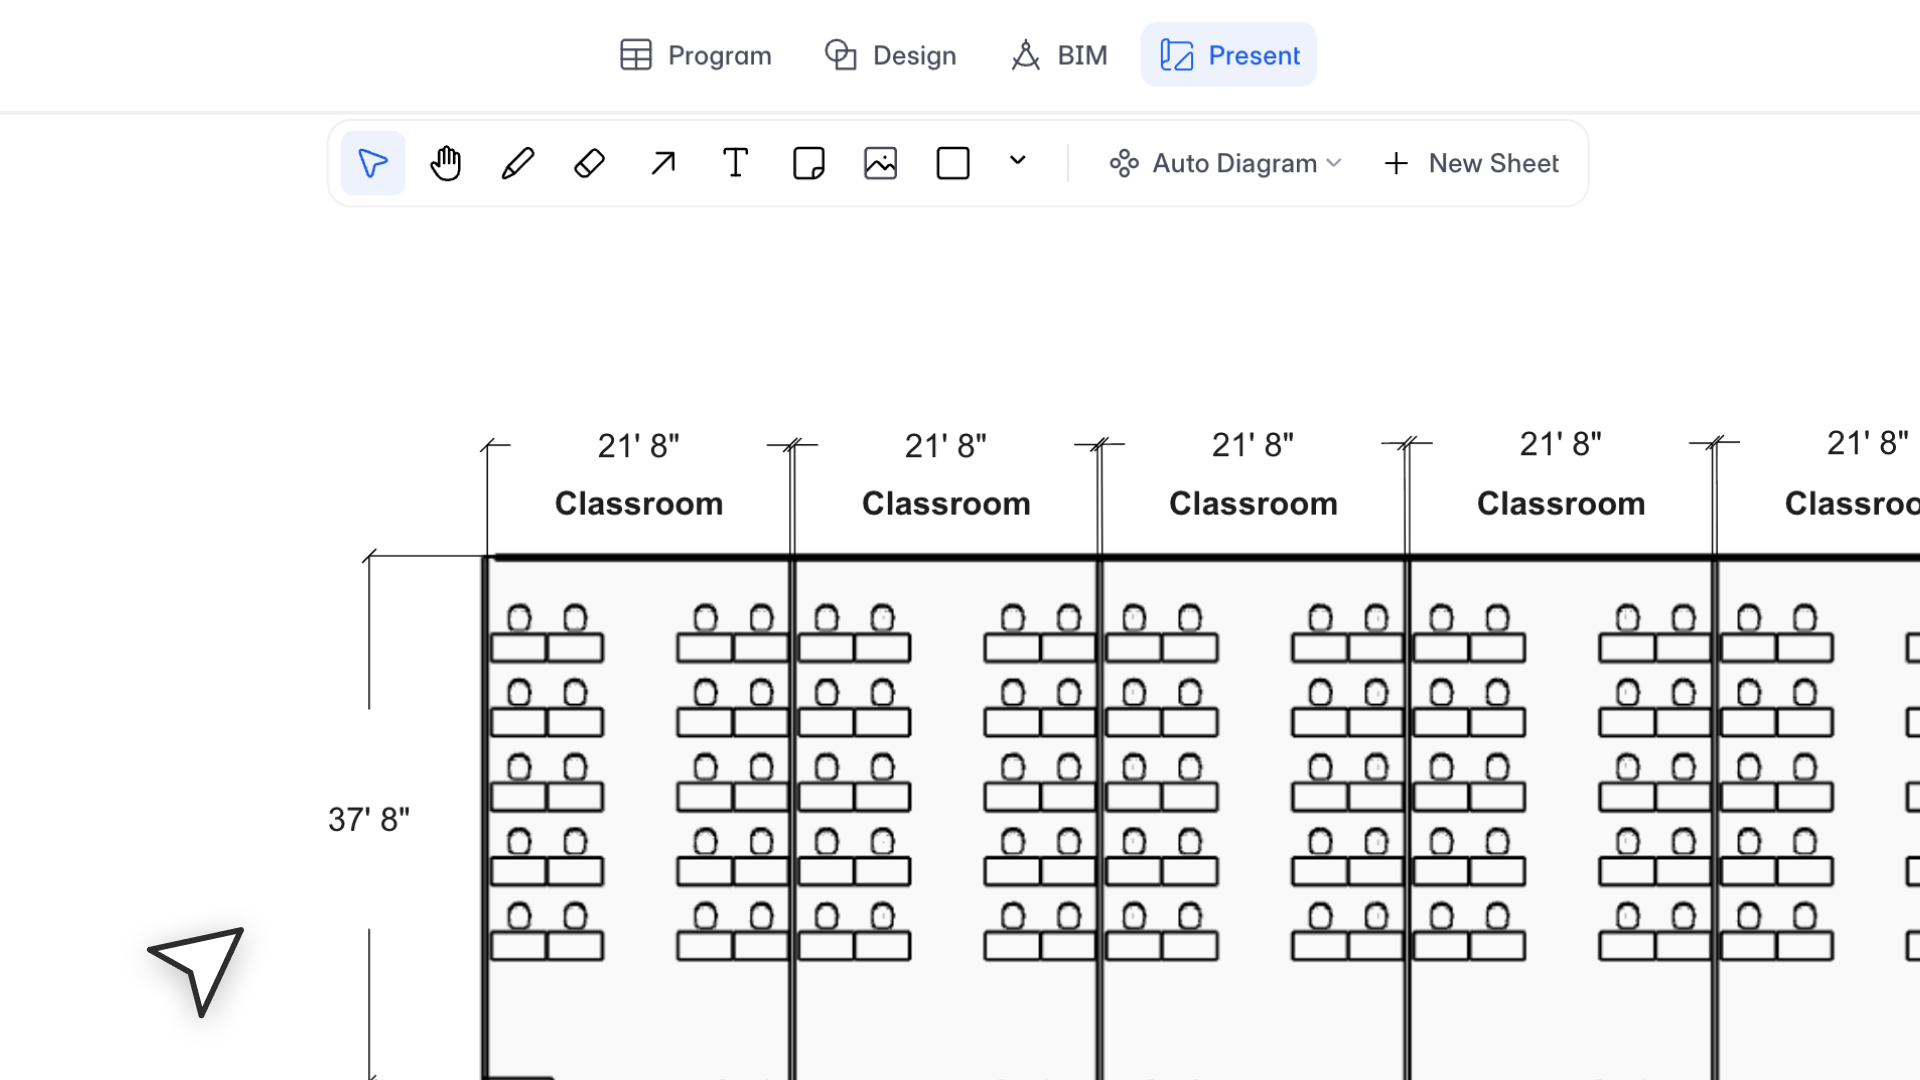
Dimensions added on the design canvas now appear automatically in Present Mode, for both SVG and raster outputs.
You can control how dimensions appear per view: show or hide them, change line color and weight, adjust font, style, and size, and move or rotate dimension text directly in the view. You can select multiple views and update dimension settings across all of them at once.
Settings persist through save and reload. Resetting a view brings dimensions back to their defaults.
How architects can use this
Before this, dimensions only existed in Design mode. Every time you prepared a presentation, you were either showing undimensioned drawings or adding annotations manually in another tool after export. Now the dimensions you add while designing carry through to your sheets automatically. For design development presentations or planning submissions where annotated drawings are expected, this removes a step that used to happen outside Snaptrude.
Import Selection and Tracing
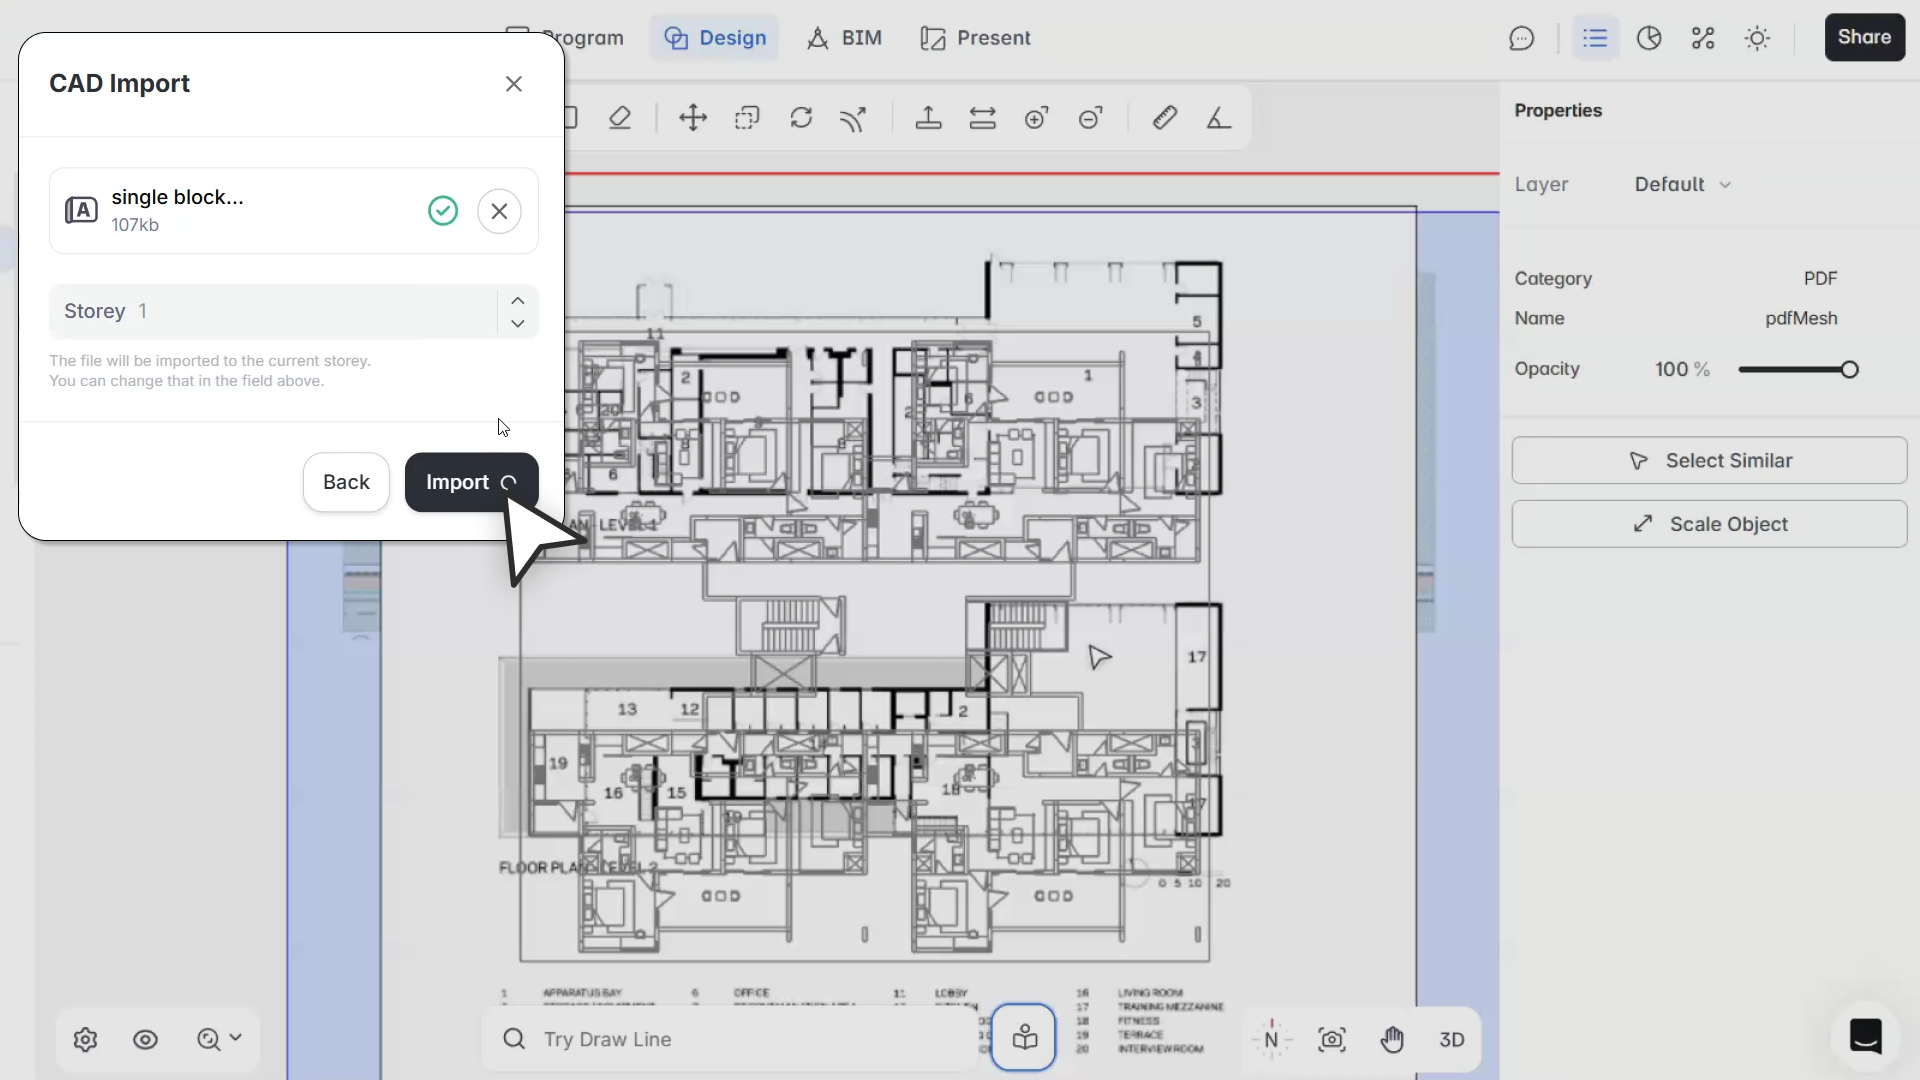
Working over reference imports, PDFs, and site plans is now more predictable.
Selection follows a consistent stacking order based on import sequence: the most recent import is selected first. You can manage stacking directly using Bring to Front and Send to Back from a right-click menu. Tab now cycles through overlapping imports in stacking order when you need to reach one that is behind another.
Imports stay visible while you draw spaces, site elements, slabs, and other geometry. Opacity is set to 50% by default on import, and each import has its own opacity control in the Properties Panel so you can adjust it to suit your reference.
Marquee selection now follows standard CAD conventions: left to right selects only imports fully inside the box, right to left selects any import that the box partially intersects.
How architects can use this
Tracing workflows are common in early design, especially when working over a site plan, a surveyor's drawing, or a client's existing layout. The previous behavior made this frustrating: imports would disappear behind new geometry, or you would accidentally select the wrong file when multiple references overlapped. The stacking order, opacity control, and visibility fixes address all of those situations directly.
In Summary
March's updates give you more precise control across five parts of the workflow: how you classify and count spaces, how the AI pipeline generates early designs, how you organize objects in a shared model, how dimensions appear in presentations, and how you work over reference imports. Each one addresses friction that has been part of the day-to-day for a while.

