Last updated:
Parking Layout Feasibility: A Geometry-First Checklist
TL;DR
Parking layout feasibility asks whether the required parking can actually fit and function within a site's geometry. It tests bays, aisles, turning paths, ramps, accessible routes, structure, slopes, entries, pedestrian movement, and program together. An area allowance can start the study, but only a laid-out and reviewed system can support a credible count.
What is parking layout feasibility?
Parking layout feasibility is the early test of whether a parking requirement can be translated into safe, accessible, code-aware, and buildable geometry on a specific site. It connects demand and regulation to the physical system of spaces, aisles, ramps, columns, walls, pedestrian routes, entrances, landscape, and services.
The first question is often numerical: how many spaces are required or targeted? The decisive question is geometric: where can those spaces go while every vehicle and person can enter, move, park, and leave as intended?
A rough efficiency factor can be useful during screening. It can convert a target count into an approximate area or compare broad concepts. It should not be presented as a layout result. Two floors with the same gross parking area can produce different capacities because of their proportions, column grid, ramp location, corners, obstructions, and access strategy.
Parking rules are jurisdiction-specific. The U.S. Access Board's ADA guide, for example, treats parking facilities separately in some configurations and requires accessible spaces to connect to accessible routes. It also addresses access aisles, surface slope, clearance, markings, and proximity to accessible entrances. These are not items that a gross-area allowance can demonstrate. (U.S. Access Board guide to parking spaces)
Why does a parking-area allowance fail?
A parking-area allowance fails when it assumes every square unit of floor plate is equally productive. Parking capacity emerges from repeated modules, but those modules meet a non-repeating boundary. The edges, corners, cores, ramps, setbacks, columns, and entrance decisions determine how much of the theoretical area can become usable parking.
Common causes of lost capacity include:
• A floor plate too narrow for the intended parking module
• An irregular boundary that leaves unusable end zones
• A ramp placed where it interrupts multiple parking rows
• Columns or shear walls within doors, aisles, or turning paths
• Dead-end aisles without acceptable maneuvering space
• Accessible spaces disconnected from an accessible entrance
• Pedestrian routes that cross or narrow vehicle circulation
• Headroom conflicts along the route to high-clearance spaces
• Slope transitions that do not work with entries or drainage
• Service, loading, refuse, bicycle, or plant requirements added late
Consider a basement shown as a simple rectangle in an area schedule. The number may suggest sufficient capacity. Once the ramp enters, a core is placed, columns align with the building above, and an accessible route reaches the lobby, the remaining geometry may support fewer spaces. The correct response is not to hide the loss inside a better average. It is to identify which constraint controls the layout and compare alternatives.
See how design options can stay connected without multiplying files.
Explore Snaptrude with one parking target and one real site envelope, then compare the area-based estimate with a geometry-based test fit.
How do you test parking layout feasibility?
Test parking layout feasibility from the outside in. Confirm the governing sources and site access first, establish the design vehicle and movement system, then lay out parking modules around fixed constraints. Count only after the geometry works.
1. Confirm requirements and design assumptions
Create a short input register covering required or target space count, user groups, accessible-space requirements, vehicle types, motorcycles, bicycles, loading, drop-off, charging, car-share, and any operational restrictions. Label each value as regulation, client target, planning assumption, or design decision.
2. Establish access and levels
Place site entries, crossings, gates, queuing, ramps, and connections to public roads. Check grade change and headroom along the whole vehicle route. A workable parking floor is irrelevant if the route into it is not viable.
3. Select a parking module
Use bay, aisle, angle, and clear-height values from the applicable authority or approved project standard. Test one-way and two-way movement deliberately. Do not combine dimensions from unrelated jurisdictions.
4. Coordinate structure and building cores
Align columns with parking modules where possible, but do not let parking alone dictate a poor building grid. Test structural alternatives alongside the program above. Place cores where pedestrian travel is clear and where stairs, lifts, lobbies, and protected routes can be coordinated.
5. Draw vehicle movement
Use the agreed design vehicle and turning method. Test entries, corners, ramp transitions, dead ends, and constrained spaces. A centerline that clears is not sufficient if the vehicle body, mirrors, overhang, or opposing movement does not.
6. Draw pedestrian and accessible movement
Connect accessible spaces and other parking areas to the building entrance using protected, legible routes. The Access Board says access aisles must connect directly to accessible routes and must not be overlapped by vehicular ways. It also warns against placing bollards, signs, columns, or other obstructions in the required clear area. (U.S. Access Board Chapter 5 standards)
7. Add secondary requirements
Place loading, refuse, plant, fire-service access, bicycle parking, landscaping, stormwater, and charging infrastructure before finalizing the count. These requirements are not leftover uses for whatever space remains.
8. Audit and count
Count valid spaces by type, not just total stalls. Identify any constrained or dependent space. Report gross area, parking count, efficiency, and exclusions using stated definitions. Keep the original target visible so the gap is clear.
What geometry should a parking feasibility study check?
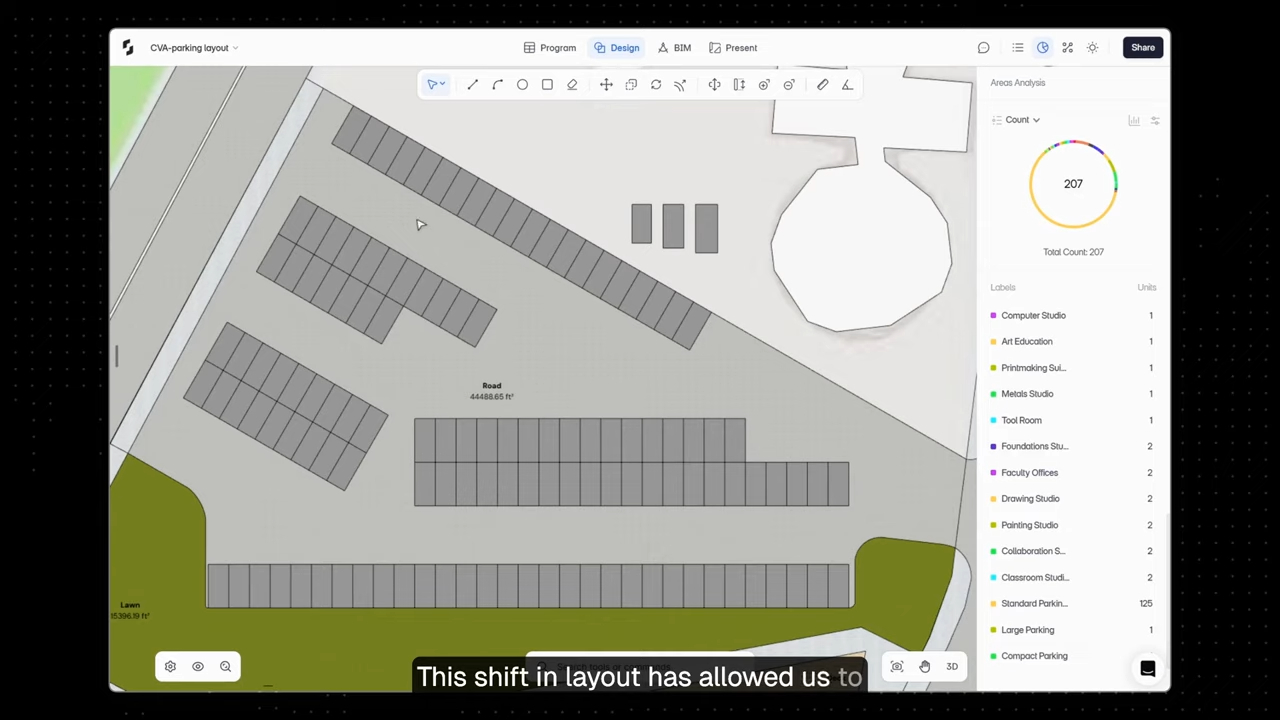
A parking feasibility study should check every continuous route and every repeated parking condition. Review the plan at both system and stall level.
Check the worst case, not just the typical module. End bays, spaces beside walls, spaces near columns, inside turns, ramp-adjacent bays, and accessible spaces usually expose problems first. Review a representative vehicle path into and out of each special condition.
The Hong Kong Buildings Department's parking-layout practice note illustrates why context matters. It addresses access, ramps, parking layouts, visibility, and maneuvering within its own regulatory system. Use such a source only where it applies, but borrow the review habit everywhere: a parking plan is a movement system, not a collection of rectangles. (Hong Kong Buildings Department parking-layout guidance)
How should parking feasibility options be compared?
Compare options using more than the final count. A higher count may come with a longer ramp, worse pedestrian movement, more structure, greater excavation, or a building grid that damages the program above. The preferred option should make the overall project work better.
Use a consistent option table:
Keep the same boundary, requirements, counting rules, and vehicle assumptions across the comparison. If an option changes one of them, state it. Otherwise a seemingly better result may simply be using a more permissive input.
Learn how residential density options can be tested in a connected design workflow.
How does Snaptrude support parking layout feasibility?
Snaptrude provides a browser-based architectural environment with connected Program, Design, BIM, and Present modes. Design Mode supports site modeling, massing studies, and parametric concept modeling. Program Mode supports area calculations and connects program data to 3D design. BIM Mode supports building elements, quantities, plans, sections, elevations, schedules, and IFC export.
That connected environment helps a team test parking as part of the whole concept. Site geometry, massing, cores, structure, area, and program can be reviewed together rather than optimized in separate drawings. Snaptrude does not certify compliance, choose the governing parking rules, or replace traffic, accessibility, structural, civil, or code professionals. Those responsibilities remain with the project team.
See how live design quantities can support early feasibility review.
References
Chapter 5: Parking Spaces: U.S. Access Board. It explains scoping and technical considerations for accessible spaces, access aisles, routes, surfaces, clearance, and facility configuration under the ADA Standards.
Chapter 5: General Site and Building Elements: U.S. Access Board. It provides the underlying technical requirements for parking spaces, access aisles, accessible routes, passenger loading zones, and clearances.
Practice Note APP-111: Design of Car Parks and Loading/Unloading Spaces: Hong Kong Buildings Department. It is a jurisdiction-specific example of coordinating access, ramp, parking, and maneuvering geometry.
FAQ: Parking Layout Feasibility
Q: What is parking layout feasibility?
A: Parking layout feasibility is the early test of whether a target or required parking count can work as real geometry on a specific site. It checks spaces, aisles, turning paths, ramps, accessible routes, structure, levels, entries, and pedestrian movement together. It supports an informed concept decision but does not replace detailed design or authority approval.
Q: Can parking capacity be estimated from area alone?
A: Area can support an initial estimate, but it cannot confirm capacity. Floor-plate proportions, ramps, cores, columns, walls, corners, accessible routes, loading, and turning needs all affect the usable count. Treat an area factor as an assumption, show its basis, and replace it with a test-fit layout before presenting the count as a dependable project output.
Q: What should be drawn before counting parking spaces?
A: Draw the site entry, vehicle route, ramps, parking bays, aisles, turning conditions, structural obstructions, cores, accessible spaces, and pedestrian routes first. Add loading, refuse, plant, bicycle, landscape, and charging requirements where applicable. Count only spaces that can be reached, used, and exited successfully under the agreed rules and design-vehicle assumptions.
Q: How should accessible parking affect early feasibility?
A: Include it from the start, not as a later conversion of standard spaces. Check required quantities, dispersion, bay and access-aisle geometry, surface slopes, vertical clearance, markings, and a direct accessible route to the entrance. Use the authority and standard applicable to the project, since scoping and technical requirements vary by jurisdiction and facility type.
Q: Which parking option is best if it has fewer spaces?
A: A lower-count option may be stronger if it improves access, pedestrian safety, structure, excavation, building program, or future flexibility while still meeting the approved requirement. Compare valid counts by type alongside ramp area, route quality, structural conflicts, cost implications, and effects above. The best parking option is the one that supports the whole project, not merely the largest number.
Q: Can Snaptrude confirm a parking layout is compliant?
A: No design platform replaces the applicable regulations, authority review, or the responsible parking, traffic, accessibility, structural, civil, and code professionals. Snaptrude can connect site, program, concept, BIM, and quantities so options are easier to test and compare. The project team must still select the governing inputs, validate geometry, and obtain required professional approvals.
Explore Snaptrude with one parking target and compare two fully drawn layouts before letting the headline count choose the scheme.