November 29, 2023
V2.0.0
Arcs
“With arcs, we unlock the potential for design innovation by seamlessly incorporating fluidity into our architectural designs. The smart guides and snaps make the tool more responsive and adaptable.”
– Aishwarya Arun, Product Specialist
What’s New
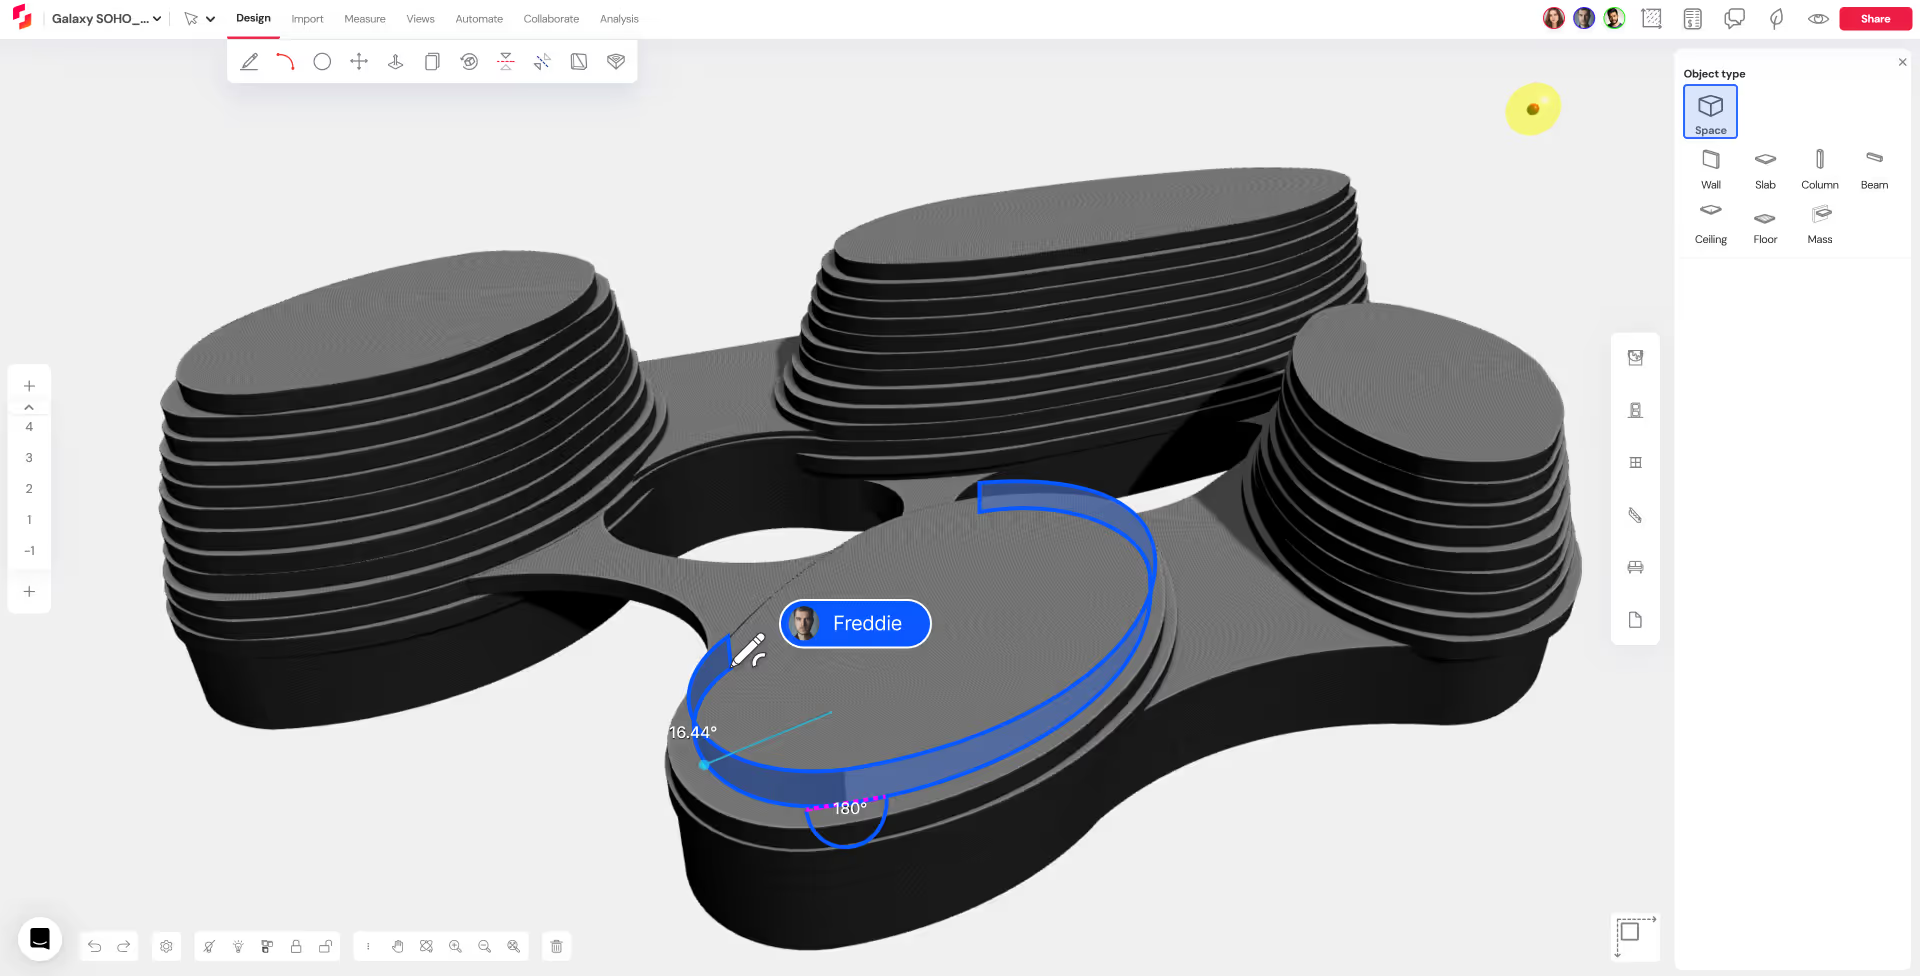
- You can now draw Spaces using a combination of lines and arcs. To draw an arc, click on the Arc tool in the Design toolbar, or use the keyboard shortcut “A”. The Arc tool is highlighted in the image below:
.avif)
- Toggle between the Line and Arc draw tools using the UI or the “L” and “A” keyboard shortcuts. Once the Arc tool is activated, it remains active till you switch back to Line tool (L).
- Arcs can be used to define a space, draw next to an existing space, and split one or multiple spaces.
- New guides and snaps have been introduced to draw arcs tangentially, make semi-circles, co-centric and concentric arcs.
- Combined with the new Draw Tab, arcs can be used to draw BIM components with ease and precision.
Drawing Arcs
Using the Arc tool (A), arcs can be drawn in three ways:
- By Snapping: Draw an arc by defining 3 points: Start -> End -> Radius.
- By Typing in Numerical Inputs: This requires the user to type in the chord length, the arc radius and an optional angle input that can be typed after pressing the Tab key.
- Using a combination of snaps and numerical inputs to draw an arc.
Curved BIM elements like walls can now be drawn in 2D and 3D using a combination of the Arc Tool and the Draw Tab.
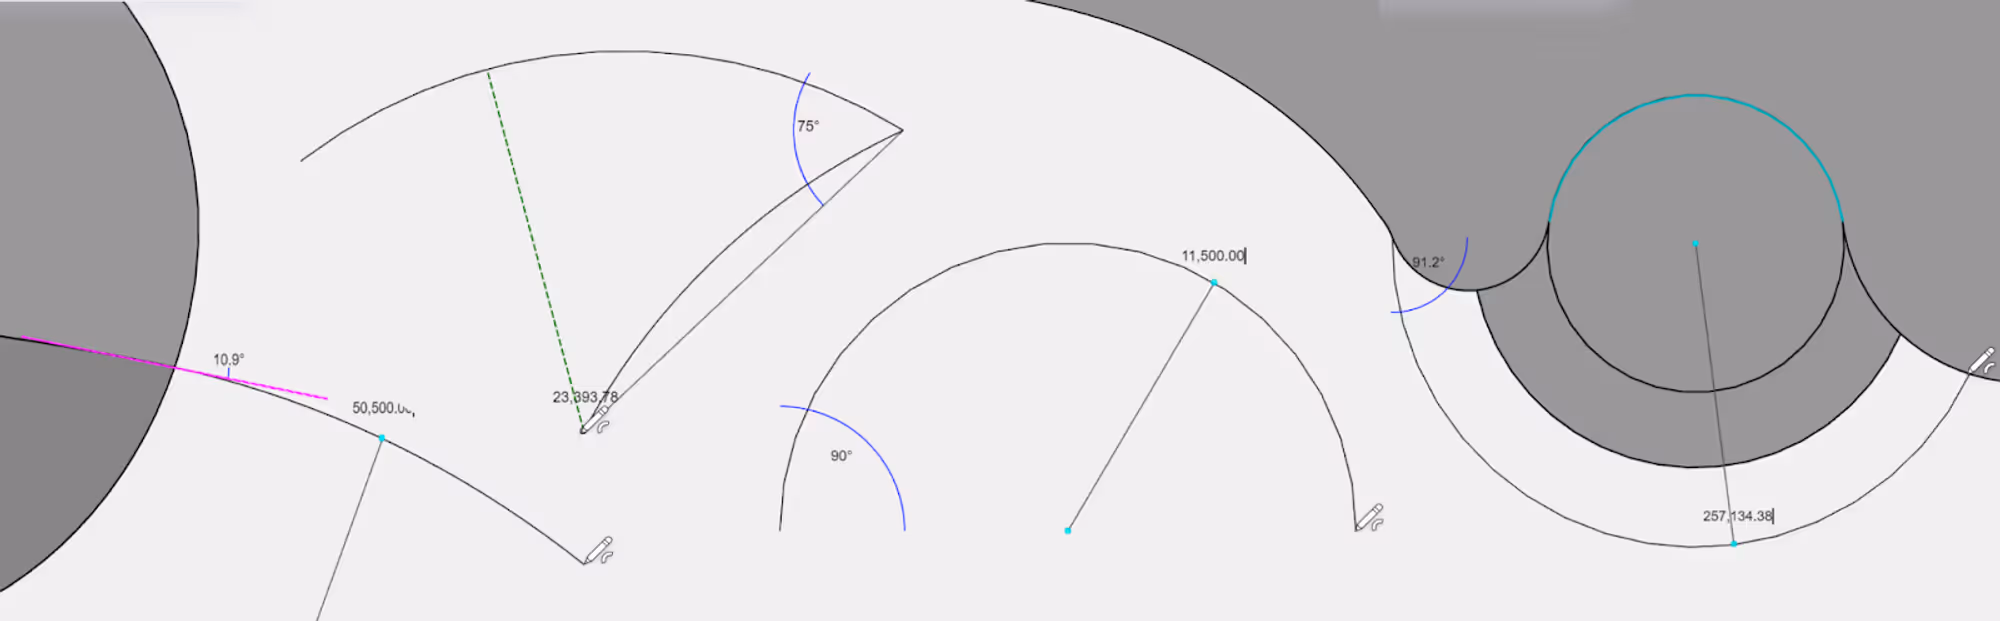
Snaps
We’ve introduced new snaps to make designing with arcs intuitive and accurate.
- Magenta Snap: A dotted magenta line indicates that the arc being drawn is tangential to the previously drawn arc.
- Green Snap: A dotted green line indicates that you are drawing perpendicular to the midpoint/endpoints of an arc.
- Cyan Arc-Centre Snap: A cyan circular snap highlights the center of an arc. This allows you to easily identify and locate the centerpoint of an arc, and draw perfect semi-circles.
- Co-Centric Snaps: We’ve also added a new snap to make it easy to draw co-centric and concentric arcs. When you reach a point of co-centricity, the original arc and its center are highlighted in cyan.
Editing arcs
You can edit arcs in one of three ways:
- Using the Edit tool (P) in 2D: To modify the shape and size of a space in 2D, use the Edit tool (P).
- Snapping to a vertex will edit the start/end points of the arc, thereby also editing the chord length, radius and angle of the arc.
- Snapping to the midpoint of the arc will edit the radius and angle of the arc, while keeping the chord length constant. All the adjacent edges will remain unaffected.
- Snapping to any point on the arc other than the midpoint will edit the mass/space as whole, all adjacent edges adapting proportionally.
- Using the Push-Pull tool (P) in 3D: Use the Push-Pull tool (P) in 3D to proportionally extrude a curved surface, perpendicular to its center. When an arc is edited using the Push-Pull tool, its radius increases or decreases, while keeping the center constant.
- Using Object Properties : The height of a space can be controlled using the object properties tab on the right. The length, width and height of curved walls can be altered in the Object Properties Tab.
Create Building tool
- The Create Building tool now auto-generates the walls, floors and slabs for a space drawn with arcs, or combinations of arcs and lines.