Last updated:
Snaptrude Release v0.3.0: The revamped Snaptrude interface

.avif)
What's in this blog
- Why did we change the UI
- Setting project units and other defaults
- Better organized toolsets
- Straightforward navigation while working in 2D or 3D environments
- Editing object’s BIM properties
- Libraries re-organized for faster workflow
Why did we change the UI
Snaptrude has a new look! The UI has been completely revamped based on extensive feedback from our users. It is now much easier to navigate and the workflow is more intuitive. It is structured, and of course, looks nicer too! :)
Improvements include:
- Easy accessibility of all features
- Grouping of frequently used toolsets for drawing, imports, views, automation, and more
- Clear presentation of project data
- Improved navigation between 2D and 3D environments
- Improved visibility of object’s properties
- Clear library interface
- Quick access toolbar for help and navigation
Setting project units and other defaults
It is now possible to set or change the units you want to work with while starting a new project. You can choose between millimeters, meters, feet-inches, and more.
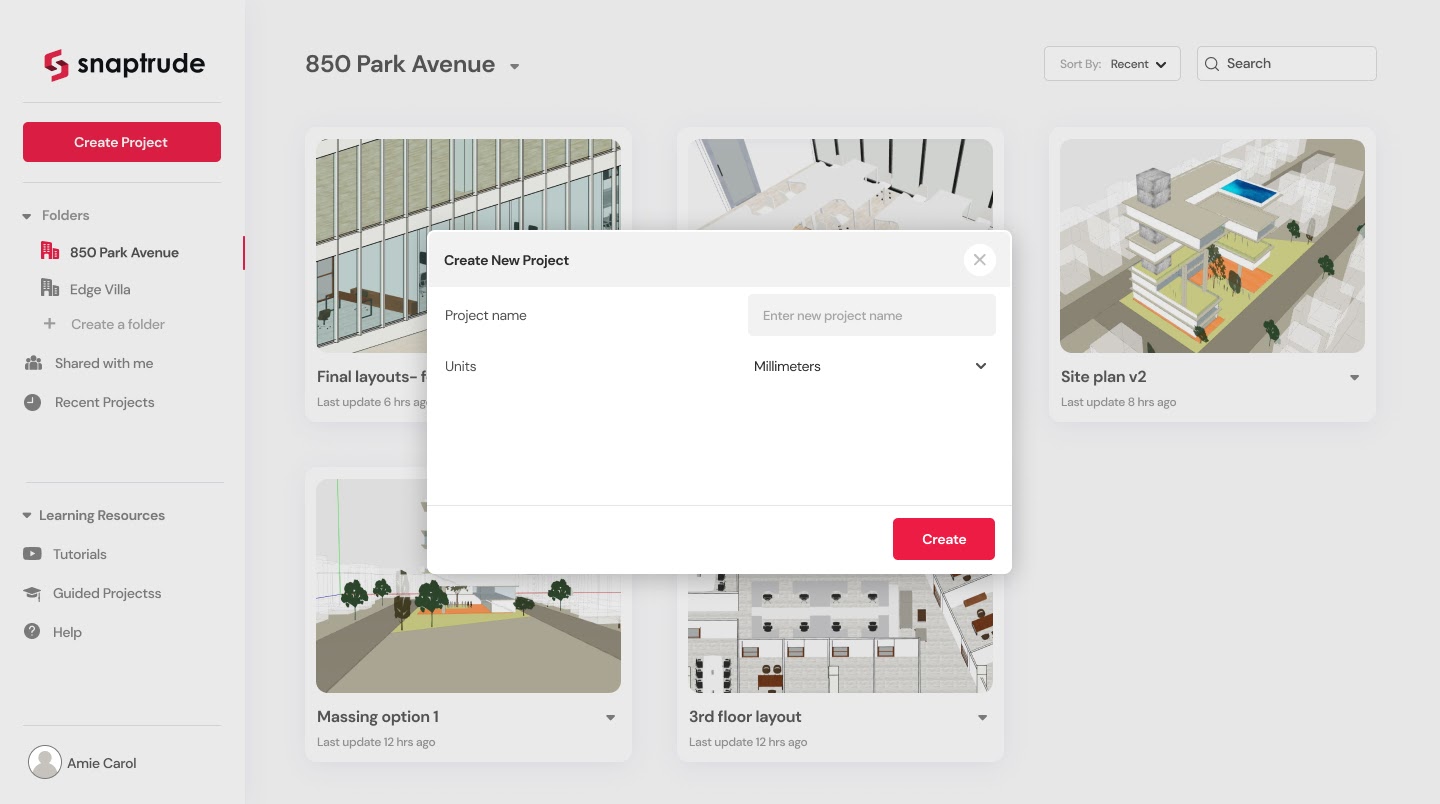
Once a project is created, a new settings button on the bottom toolbar allows you to control project units and other default properties. These are divided into sections for clarity. Sections include units (which contains tolerances, snap constraints, etc), and construction (default wall types, slab thickness, plinth height, etc).

Better organized toolsets
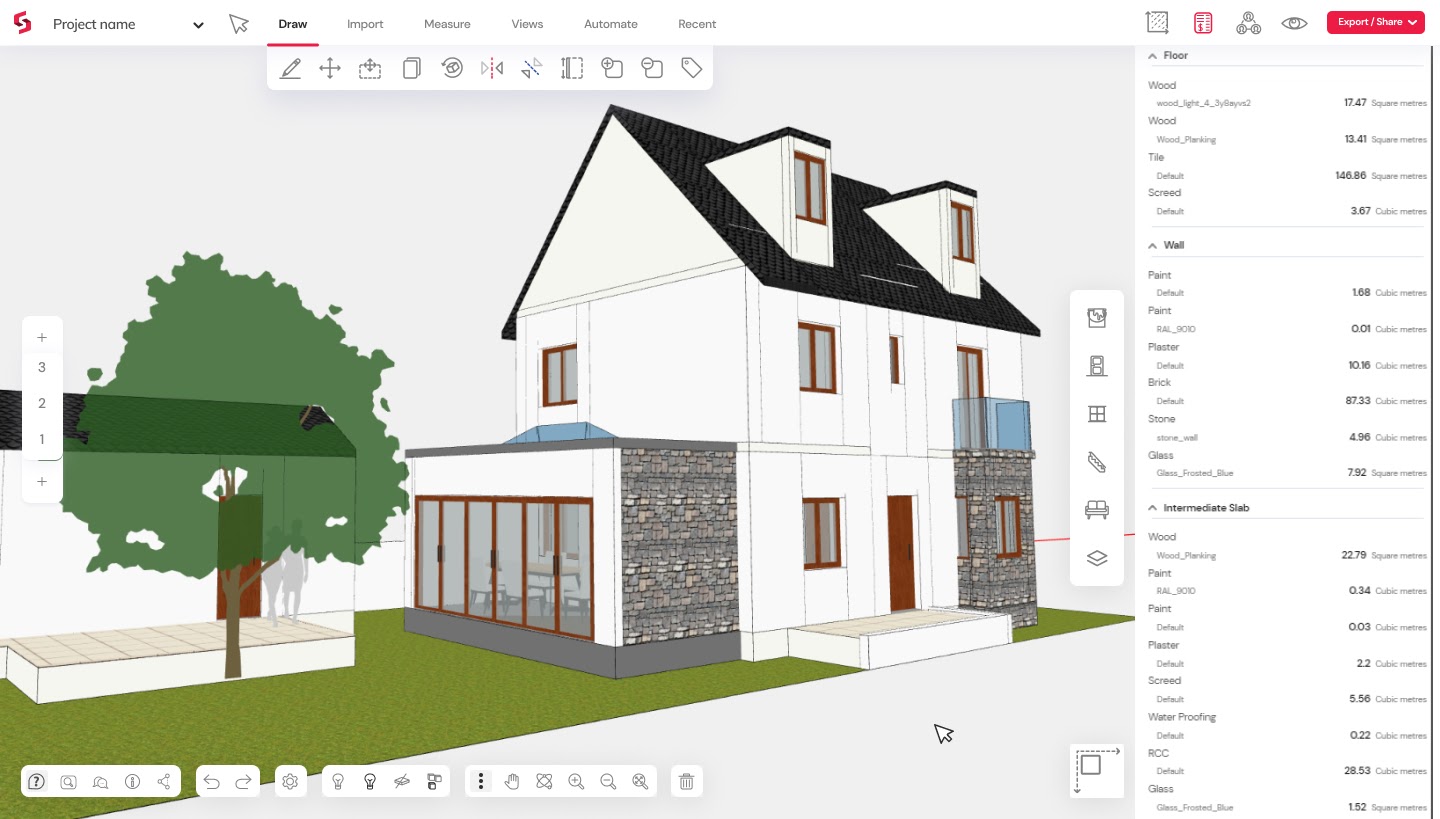
With the new UI, feature sets are grouped and restructured for a more seamless workflow. It is much easier to find the tools you are looking for under clearly named tabs. The top bar is divided into the file menu, modelling toolset and data panel.
The modelling toolbar contains all the tools for drawing, importing objects, setting views and Snaptrude’s specialised automation features. These are grouped into tabs based on functionality.
The Draw tab includes all the drawing and editing tools. Use the Draw tool to start drawing rooms. Aside from the standard tool functionality, double-clicking with some tools enables additional functionality. For example, with the Move tool, double click on a room edge to move the edge. Similarly, use double click with the Select tool to label rooms rather than selecting them.

The Import tab contains the tools to import images, AutoCAD drawing, site topography and others. The Measure tab contains tools for measuring, rescaling and setting datum. All the automation tools are grouped under the Automate tab. These include:
- Create Drawing- Create a mass model from line sketches
- Create Building- Auto generate walls, slabs and flooring from a massing model
- Auto Interiors- Automatically place furniture in labelled rooms
- Auto Dimensions- Automatically dimension plan drawings

The View tools are also better organised. New buttons are added for top, front, left, right, and rear views as well as for setting camera position, using shadows and saving views. More comprehensive view settings allow you to present your design in the style you prefer (textured, monochrome, without lines, or isometric)

A tab has also been added for the most recently used tools for quick access.
The data panel on the right side makes project data more easily accessible. It contains all the auto-calculated data reports and other actionable information for your project. This includes the bill of quantities and area calculations. It also includes a section for comments from your collaborators and saved model views.
Straightforward navigation while working in 2D or 3D environments
On Snaptrude, you can work on 3D views or any storey’s plan views. In the new interface, you can quickly toggle between these environments using the View Toggle button. Working on multi-storey projects is much easier now with storeys separated into an accessible section. Clicking on a storey takes you to the storey plan.
You can hover on a storey to view more options. Click on the arrow that appears when you hover on a storey number. The dropdown allows you to change storey height, storey name, select all the rooms/ objects on the storey, and hide the storey.
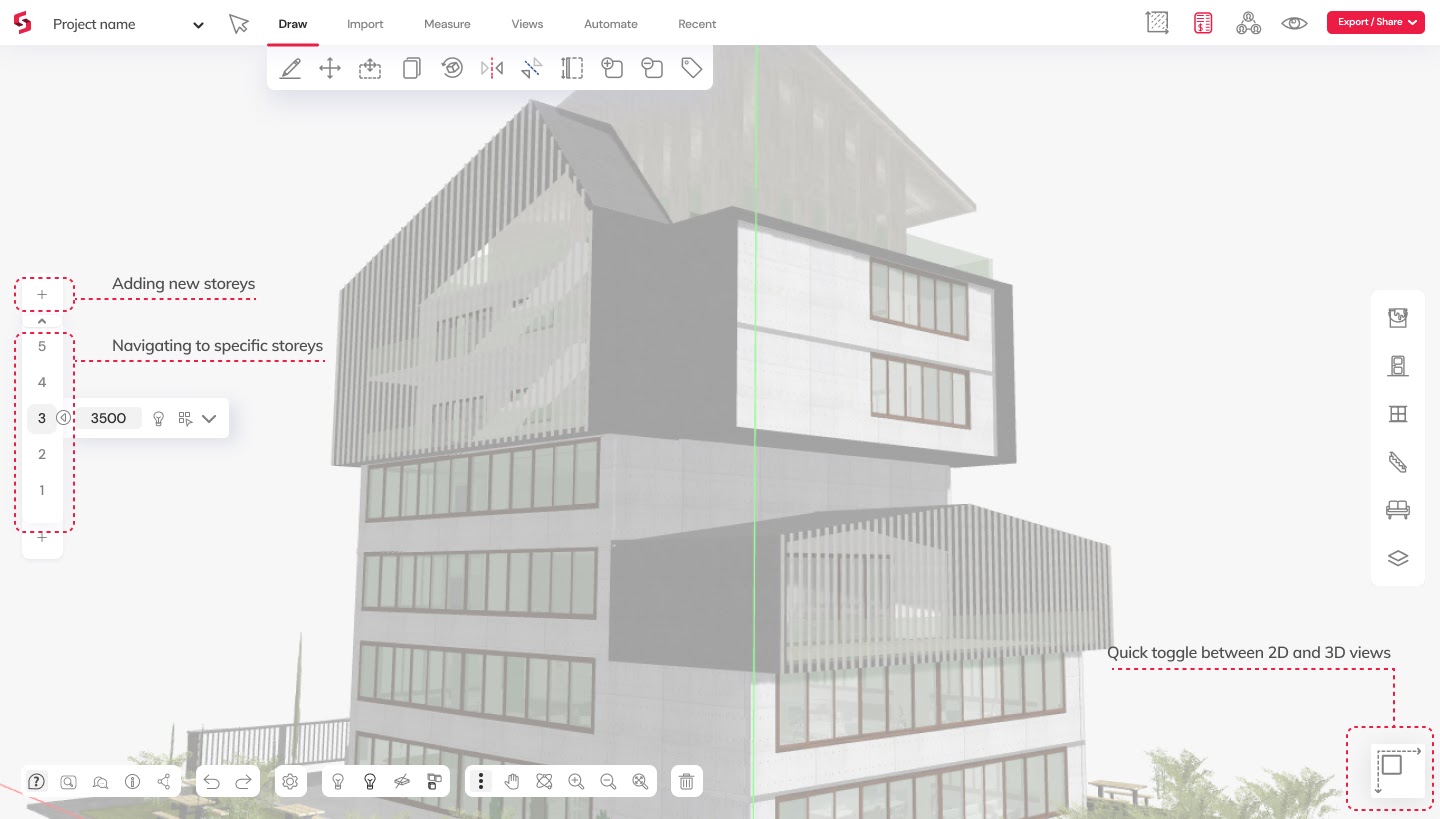
Use the Add Storey buttons to add floors above or basements below. This is further contextual as well. If objects are selected on the canvas, the Add Storey button allows you to copy those objects onto one or more new storeys. You can always turn the toggle back to Blank to create empty storeys.
Many users wish to use Snaptrude on the run, without a mouse. Explicit pan, orbit and zoom buttons are added to the bottom bar. Intuitive keyboard shortcuts are also added for the most commonly used features.

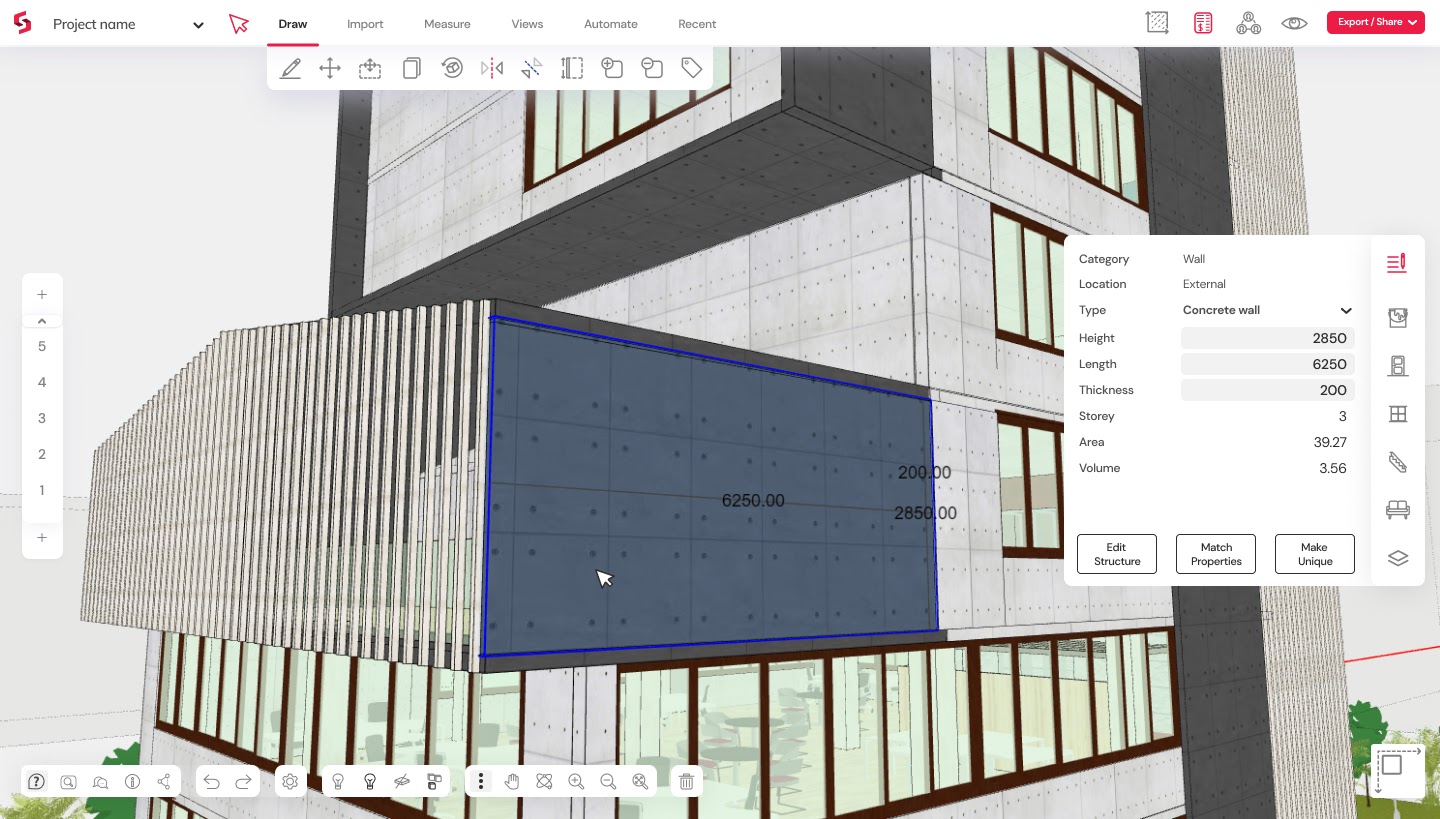
Editing object’s BIM properties
When an object is selected on the canvas, its BIM properties panel automatically opens up. If it does not, click the Properties button to display it.
Libraries re-organized for faster workflow
Snaptrude has a built-in library of materials, fenestration elements, parametric staircases and furniture. These are displayed in the right panel. A search bar has been added to make it easier to search for the objects you are looking for from Snaptrude’s extensive library. All the tools for adding objects and categories to the library are also located here.
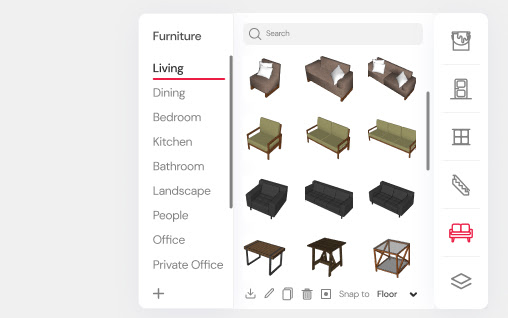
Categorization of doors and windows has improved, allowing users to select the type of door, and the number of shutters, for example. Similarly, furniture is organized into families of similar objects, i.e., those with similar materials and styles. This makes it incredibly quick to put together a great looking interior layout.
The workflow for editing and duplicating materials is simplified. To edit a material, simply select it from the library by clicking on it, or use the eyedropper tool to select it from the model. Now click on the Edit button. The materials panel is replaced by an edit panel, where you can change its properties. Similarly, to duplicate a material, select the material and click on Copy.
Snaptrude offers a 14 day free trial and is free for students and educators.

