Last updated:
How we built the Revit <> Snaptrude bi-directional Import/Export link

The Revit<>Snaptrude bi-directional link allows users to easily import and export models between Revit and Snaptrude, enabling design changes, client presentations, and sign-offs to be completed through Snaptrude's cloud-based collaborative platform. This ensures an efficient design workflow, with instant feedback and ease of use. Many people were curious to know how we managed to build this, so we thought we'd write about it!
How we Import Revit Models to Snaptrude
The Revit<>Snaptrude bi-directional link was conceived with the help of Speckle, an interoperability platform allowing data transfer between various architecture tools. The Speckle-Revit connector converts Revit data into Speckle format called the "Base Object." Snaptrude accesses the base object through an API request, parses it, and recreates the geometry and parameters on Snaptrude. With Speckle, we were confident that a bi-directional workflow was possible, but we knew we had a long way to go.
The Speckle-Revit connector worked well for basic Revit elements and geometry, but it failed when handling more complex objects and crucial parameters required by Snaptrude. To solve this, we switched to Dynamo, an open-source visual programming language for Autodesk Revit. Speckle had already built a custom Dynamo node that would provide the same "Base Object" output required by Snaptrude. So, we only had to add custom data into Speckle through Dynamo to recreate elements on Snaptrude.
Once we handled the geometry, we had to figure out how to import visual data, such as materials and textures linked to the objects. Materials in 3D software are mapped using UVs. UVs are two-dimensional coordinates that correspond with the geometry's vertices. It is essential to connect a surface mesh to the texture. Speckle and the Revit API had restrictions when extracting the UV data. Hence, mapping materials to Assemblies, Nested Families, Model Groups, and Caseworks from Revit was challenging.
So we built a workaround with an alternative "CustomExporter" API on Revit, which helped us accurately map textures to any object type. Eventually, we successfully imported most Revit elements, including linked Revit models, with their parameters and material data intact.

How we Reconstruct Objects on Snaptrude
Snaptrude uses profiles and advanced BREP algorithms to reconstruct Revit elements from the Speckle data. Profiles are nothing but the 2D outline of the object. Snaptrude's algorithms can recreate elements from vertical and horizontal profiles and handle more complex geometry, like walls with embedded elements like doors or floor slabs with cutouts.
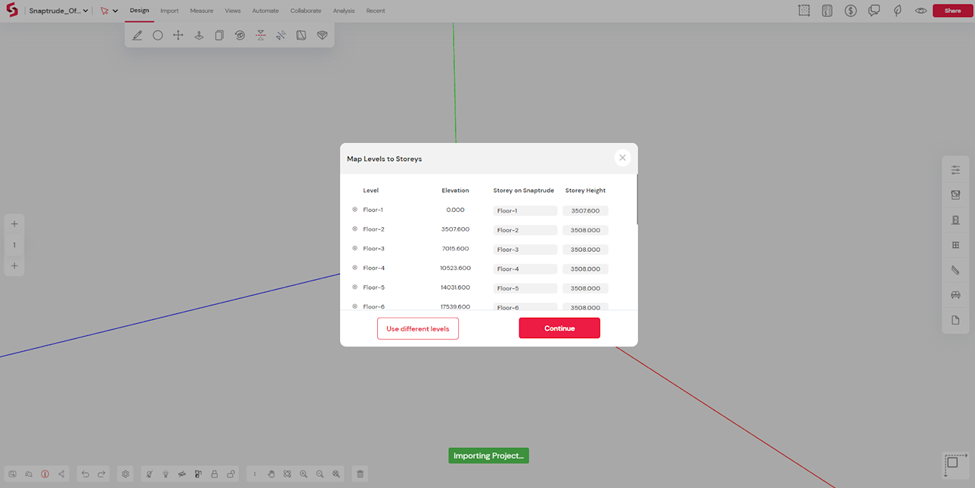
Once Snaptrude receives the data, the elements are mapped to a "Storey." Storey is similar to Levels on Revit, defined by a base and top reference. When a model is imported, a custom mapping engine automatically creates the Storeys based on the Level data from Revit. It also allows users to skip over irrelevant levels on import.
Improving the Performance of Large Models
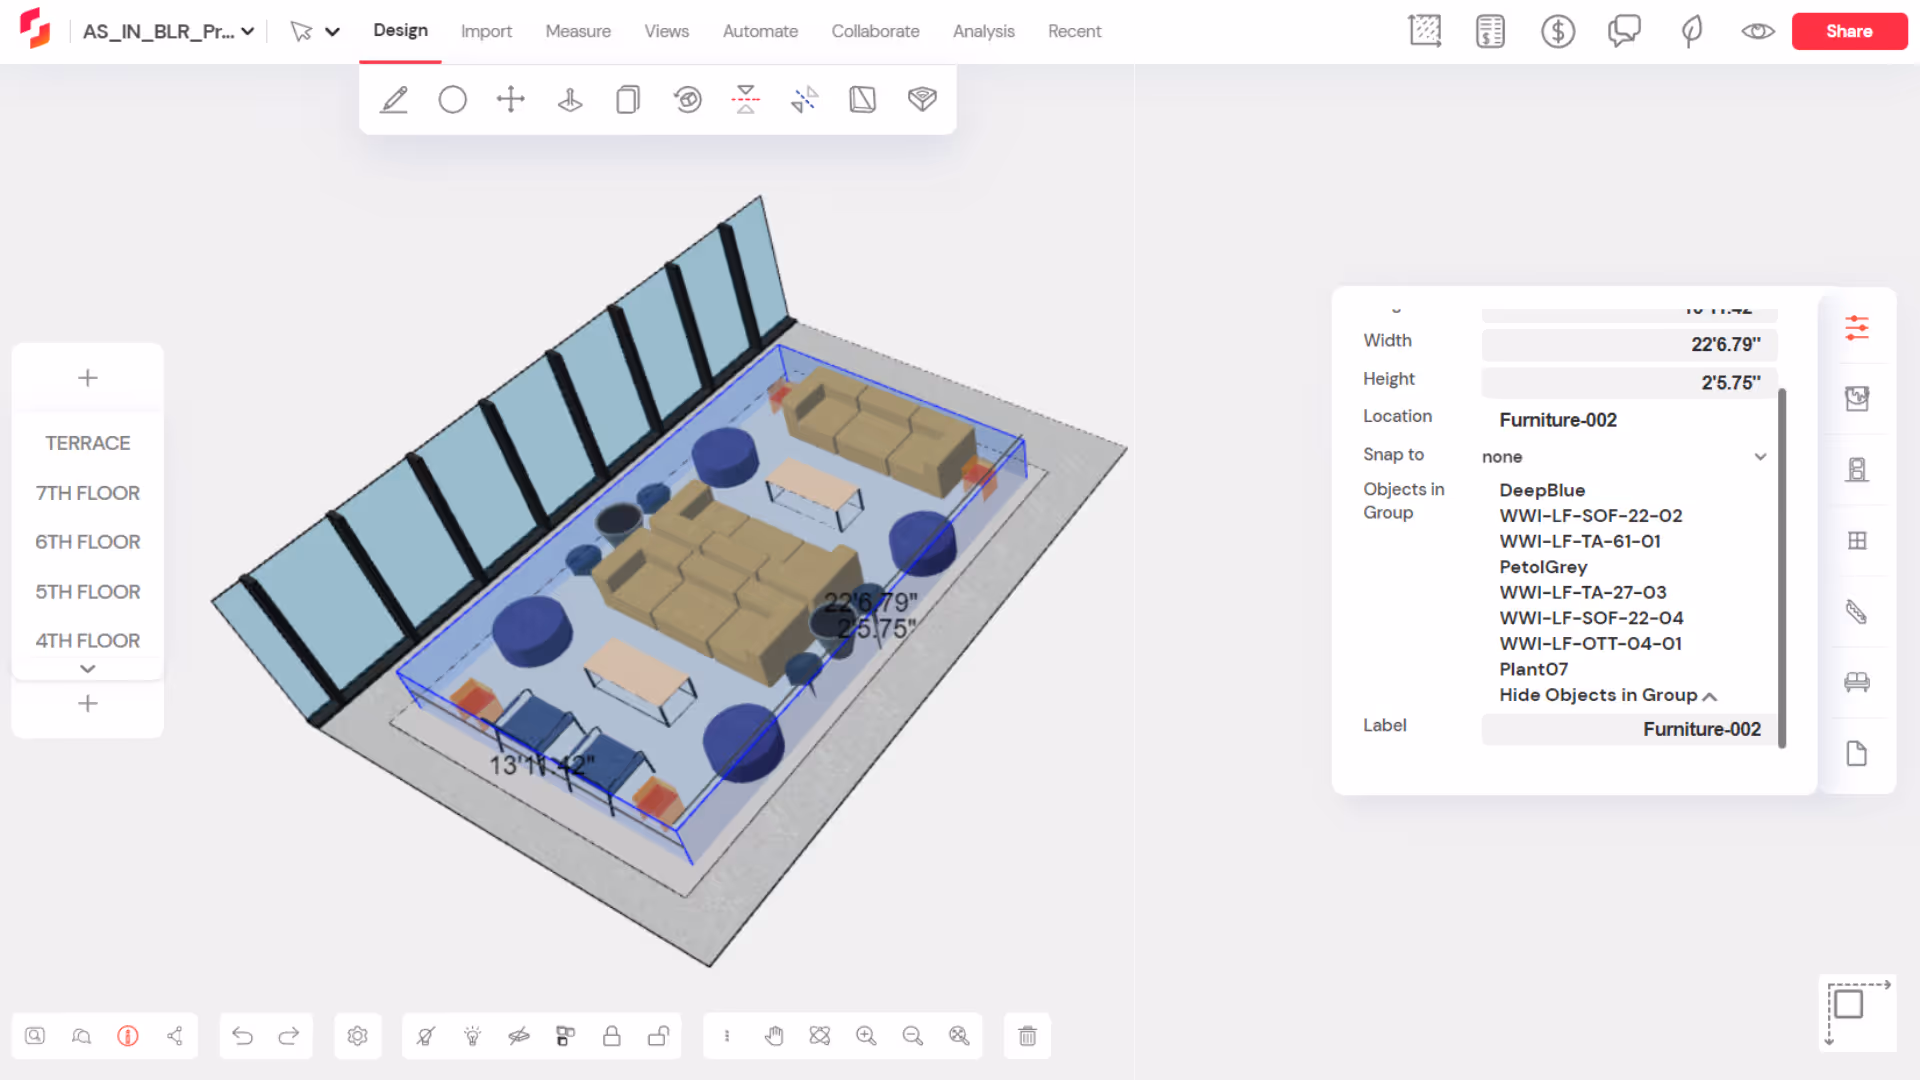
Snaptrude is a cloud-based design environment; understandably, handling large Revit models was a problem. We had to optimize our application extensively to make large models work seamlessly on a browser. One such optimization was the use of "instancing." When your model has multiple instances of an object like a door, window, or furniture, instancing allows us to render all of them with a single drawing call instead of one for each object. This significantly helped improve large models' FPS when using camera controls or editing.
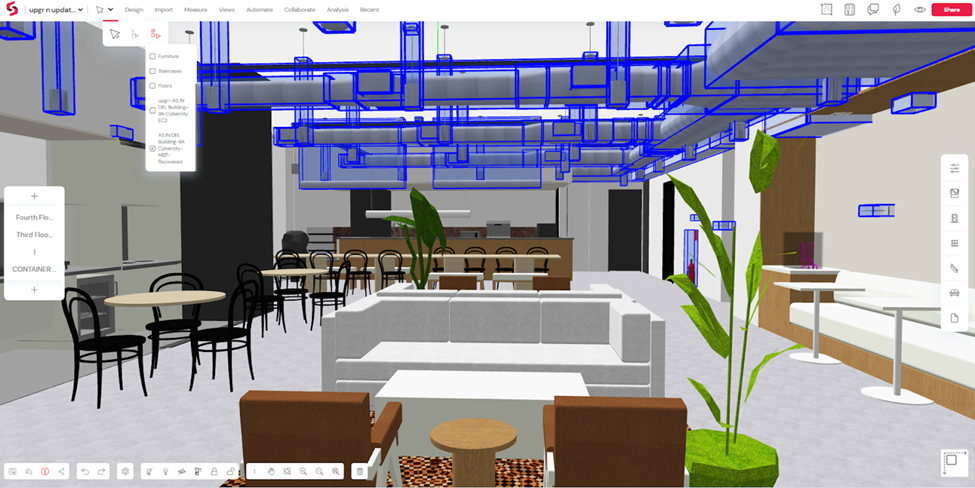
Sending large amounts of data from Revit to our servers was also a roadblock. We implemented ways to serialize and compress this data to improve import speeds and minimize latency. Another way of handling large models is by sending parts of them to Snaptrude. Users can crop the model using the section box or hide unwanted elements in their 3D view before exporting. Combined with the folders feature on Snaptrude, users can save the model in parts and maintain multiple versions of them in Snaptrude folders, similar to Google Drive.
Reconciling Model Changes with Revit
With one leg of the bi-directional workflow resolved, we had to flesh out the other. In the early days of Snaptrude, we developed a native Revit exporter that uses Autodesk Forge to convert a Snaptrude model to a .rvt file. To achieve a seamless bi-directional experience, we removed Forge from the process and rebuilt the exporter into a Revit plugin called the Snaptrude Manager. To reconcile model changes with Revit, users can export the model as a .trude file which the Snaptrude Manager can process. The unified interface of the Snaptrude Manager made the bi-directional workflow seamless. Moreover, Revit Element IDs helped us reconcile only the elements that have been modified, reducing the time taken by over 50%.
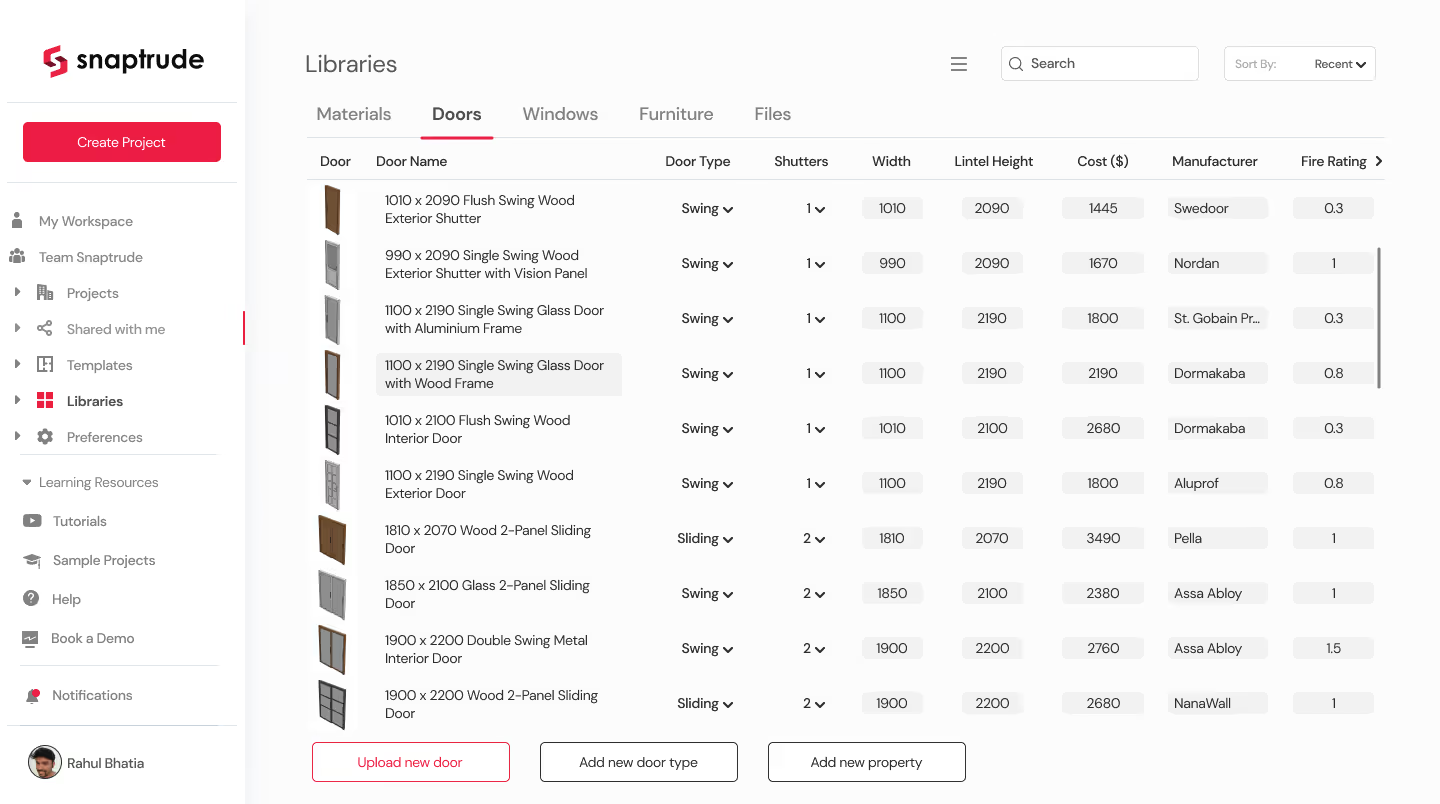
However, we faced several challenges in development. One issue was library management, where a firm's standard Revit library had to be mapped in Snaptrude. We realized that doing this would help maintain data consistency and speed up the reconciliation process. So we built a library manager on Snaptrude where users can upload their Revit objects as .fbx models and manage parameters like Name, Cost, and Dimensions, among others. If an object is not a part of the Snaptrude library, it is still exported to Revit using the DirectShape API. Teams can also upload material data to the library, ensuring that the objects are rendered with the correct materials on Snaptrude and when reconciled back to Revit.
Next Steps
To prioritize what gets imported to Snaptrude, we worked closely with our enterprise clients like WeWork. We realized that every firm or company had its unique processes and workflows around BIM. So we continue to develop this workflow by collaborating with our clients. You can find the most up-to-date information on releases in our release blog.

